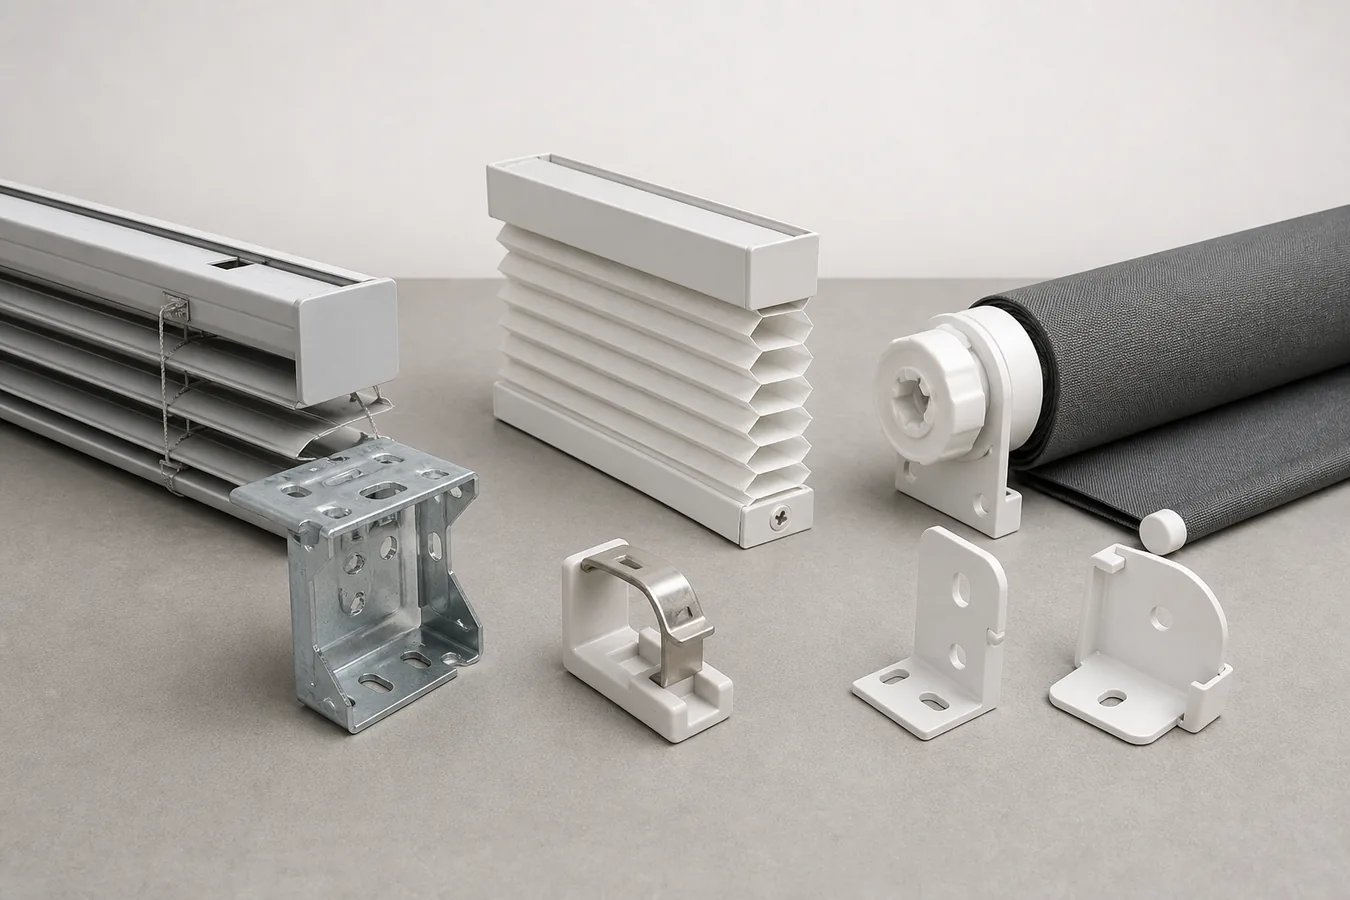
The photograph that does the most useful work is not a close-up of the loose bracket. It is the joint where that bracket meets the headrail—or, on a roller shade, where each end of the tube meets its support. That interface carries the evidence a look-alike listing leaves out.
A replacement candidate is ready to buy only when the exact product identity, bracket interface, left/right role, mount direction, part or kit record, required count and current installation instructions agree. Color, a similar outline and a few matching dimensions can narrow a search. They cannot close it.
If one of those fields is missing, do not compensate with a “universal” title or a new hole. Route the case to the manufacturer or a qualified parts dealer, replace a larger documented assembly, or hold the repair.
Do not shop from the loose bracket
Start with the installed covering. Photograph its label, headrail or cassette, control side and full width. Save the original order, invoice or manual if it still exists. A family name, model, production period and control can reduce thousands of plausible metal and plastic shapes to the correct parts record.
Keep the old bracket in context until you have captured how it releases. If the covering must come down first, use the blind-removal guide to identify the release behavior without turning this page into a removal tutorial. Do not pry harder merely to expose a part number.
Then photograph the bracket from the room side, window side, top, bottom and the surface that touches the product. Include a ruler in the same plane. Record stamped letters and molded numbers exactly, including spaces and dashes. These are search inputs, not independent proof.
An exact Comfortex replacement listing shows what adequate evidence looks like: it identifies a 1 3/8-inch headrail, a CS707 part code, listed product families and a quantity of one bracket. Those fields support that named listing; they do not make the same-looking bracket compatible with another headrail.
Build the interface card before you search
Use one record for the product and the hardware. The blank cells are more useful than confident guesses because they show exactly what a manufacturer or dealer still needs to answer.
| Field to return | Evidence to capture | What prevents approval |
|---|---|---|
| Exact product identity | Brand, family, model, control, label, order and approximate production date | Only a generic name such as “cellular shade” |
| Product-side interface | Headrail cross-section and lip, clip seat, cassette slot, or both roller-tube ends | Only the wall-facing side of a loose bracket |
| Bracket identity | Every marking, full shape and dimensions from several views | A visually similar marketplace photo |
| Handed role | Left/right, drive/idler, or documented interchangeable status | Assuming two roller ends are the same |
| Mount plane | Inside, ceiling/top, wall/face or other documented orientation | Rotating a bracket because the holes happen to line up |
| Exact part route | Current manufacturer/dealer part number, kit number or written identification | “Universal,” “fits most,” or an unscoped compatibility list |
| Quantity and position | Required count, edge offsets, spacing and mechanism-clearance zones from the exact manual | Copying the old count or a different product’s spacing |
| Installation boundary | Approved instructions, mounting surface condition and service path | No current instructions, damaged support or an improvised adapter |
Before filling the mount row, record the actual opening and mounting surface in the Smart Shade Measurement and Compatibility Checker. The checker does not identify a bracket. It keeps the headrail and replacement hardware tied to the window where they must work.
The card produces only four useful outcomes: an exact documented replacement; a complete identification request; a larger replacement or professional review; or a hold. “Probably fits” is not a fifth outcome.
The product family changes what “match” means
Horizontal blinds: capture the headrail cross-section
Many horizontal blinds use box-like or concealed supports, but the box silhouette is not the interface. Photograph the headrail end with the end cap removed only when the product instructions permit it. Capture the front and rear lips, the height of the rail, the latch or hinged door, and where the internal tilt and lift mechanisms sit.
That last view matters after installation as well as during shopping. A bracket can appear to hold the rail yet block a mechanism or land where the manual reserves clearance. Current LEVOLOR hidden-bracket instructions position brackets around the product’s internal hardware. Use that document for that system only; take the rule—not the dimensions—to your own search: mechanism clearance comes from the exact installation record.
Cellular and Roman shades: show the lip that the clip grips
A compact spring clip usually works by engaging a particular edge or channel. Its outside width does not tell you the lip thickness, hook depth, spring travel or release direction. Photograph the rail from the end so the profile is visible, then photograph one correctly seated clip before removal if that can be done safely.
An Elite Roman kit guide, for example, shows its spring-tab bracket engaging its own headrail and places the brackets for that named kit. It is useful evidence of how an interface should be documented. Its placement figure is not a spacing rule for other Roman or cellular shades.
If a Roman shade has a board, custom headrail or integrated motor enclosure instead of the rail shown in a listing, stop searching by the words “Roman shade bracket.” The construction has changed the replacement task. Ask the fabricator or manufacturer for the assembly record.
Roller shades: label both ends before comparing parts
A roller tube normally has an operating end and an idler end. The sockets, posts, tabs and bracket openings can differ, and the control side can determine which part belongs on which side. Photograph the complete shade from the room, then the drive-side interface and the idler-side interface separately. Label the photos by the user’s left and right while facing the window; do not rely on ambiguous filenames.
Lutron’s roller-bracket support distinguishes named bracket types by their end interfaces. That is evidence for those systems and a warning for every search: one correct-looking end does not approve the pair. Match the tube or shade type, both interfaces, control side and any fascia or cassette kit as one record.
For an outside-mounted roller, keep bracket projection and finished fabric coverage in the outside-mount roller-shade plan. If a cassette hides the connection, use the cassette roller-shade guide to preserve the complete enclosure and service path. Neither dimension can substitute for the exact end-bracket identity.
Age can change the part without changing the color
Do not assume the newest bracket supersedes the old one. Current Hunter Douglas replacement guidance separates parts by product family and dates, marks some older parts obsolete and warns in at least one family that newer 2.0 brackets do not work with older shades. Another named manufacturer repair record describes an exact retrofit kit that works across several specified headrails. These are opposite outcomes from the same manufacturer because the documented products differ.
Treat a retrofit as an exception that needs a current written scope. Save the page or support response with the order. Check whether the instruction requires all brackets to be replaced as a set rather than mixing old and new hardware. Confirm that the named shade family, operating system and production period cover your unit.
A seller’s photo of a new white bracket beside an old white bracket cannot answer any of those questions. When the old part is discontinued, ask for the current replacement path—not merely the nearest shape.
Mount direction is a second filter
Part compatibility and installation orientation are two separate approvals. The same documented bracket may permit more than one mount direction, or a product may require a different kit for top/ceiling and face/wall mounting. Decide the real mount with the inside-versus-outside mount guide, then verify that direction in the exact bracket instructions.
Do not reuse an old hole simply because it exists. First confirm that the bracket belongs there, that the headrail can latch and release, that screws will not enter the mechanism zone, and that adjacent handles, trim or a cassette will not block service. Copy the required bracket count, maximum spacing and end offsets only from the current instructions for the exact product and width. A number printed in another brand’s manual is not a conservative fallback.
Bracket compatibility also does not select a structural fastener. Wall, ceiling, trim and masonry conditions require suitable support and hardware. If the prior fastener pulled out, the surface is cracked, the opening conceals utilities, or the instructions do not cover the substrate, the decision has left the replacement-part task. Route it to an installer or other qualified professional instead of enlarging holes around an unverified bracket.
Send one identification request that can be answered
Do not send ten cropped photos with “Do you have this?” Put the evidence into one message and ask the recipient to identify the part and the installation record together.
Please identify the current replacement mounting bracket or kit for this exact blind or shade. Attached are the product label and order information, approximate purchase date, full covering and headrail/cassette photos, end-profile and bracket-interface photos, all bracket markings and dimensions, both roller ends where applicable, control side, mounting direction, opening record and mounting-surface photo. Please return the exact part/kit number, left/right or interchangeable status, required quantity and spacing, whether every bracket must be replaced, and the current installation instructions. If no documented replacement applies, please say which larger assembly or product must be replaced.
Keep the response with the order. Before paying, compare the returned part number and scope with the current product page or support record. Inventory can change; the identity chain is what survives.
Know when this is no longer a bracket repair
| Evidence state | Route | Do not do |
|---|---|---|
| Product, interface, handed role, mount, exact part, count and instructions all agree | Buy that documented replacement and follow its current installation path | Add an unlisted adapter or mix generations |
| Product is known but the part or compatibility remains unresolved | Send the complete identification request to the manufacturer or a qualified parts dealer | Choose by color, thumbnail or “fits most” |
| The headrail/cassette is damaged, the part is obsolete without a documented successor, or the support surface is compromised | Price the documented larger assembly, complete covering or professional repair | Force the old rail onto a near-match |
| Product identity, interface or current instructions cannot be established | Hold the purchase until the missing field is closed | Drill speculative holes |
If the bracket problem exposes missing dimensions, control eligibility or service access elsewhere in the order, reopen the smart motorized blinds ordering-mistakes guide before replacing the complete covering.
A mounting bracket is a small part, but its evidence trail is not. Match the installed product to the mechanical interface, then match that interface to a current documented part. If the chain breaks, stop at the break instead of asking a look-alike to carry the blind.